Monday, September 25, 2017

Ottobre 03/2015-24

This sweet faced boy doesn't get much sewing time. He has a lot of handmade clothing passed down from Logan, so he really doesn't need much, and he lives in tee shirts and shorts anyway. He only has one dress shirt, and it was purchased for Logan, so it's in rough shape now. It was time for a nice new one of his own.
This is Ottobre 03/2015-24, which is a sport shirt with some nice details. The back yoke is echoed in front and there are several pocket options.
The fabric I used is a tiny stripe, so I had fun playing with directions along the yoke and pocket. I cut the main body of the shirt on grain, with the front yoke on the bias and pocket on the cross grain.
In the back, the yoke is on the cross grain. The shirt has a nice fit, with just a little shaping.
Back ease is incorporated into two pleats near the armhole area, rather than the traditional center back pleat. I like the sporty look it has. It suits Duncan's active personality.
The shirt has button bands and a one piece collar. The pattern calls for buttons, but since Duncan likes to Hulk out of his clothing, I went with snaps. I hadn't applied snaps in a while, so it took me a few tries to get them on properly, but I like the way they turned out.
I've missed sewing for my sweet boy. There never seems time enough for all the projects I'd like to do, but I definitely need to make more time for Duncan.

Monday, September 11, 2017

McCalls 6794 top and some Eleonore jeans

I love a quick knit top, which is probably why my dresser is full of them, but there is just something a little classier about a top made from a woven fabric. It stops being "just a tee shirt" and, even in a casual, easy wearing style, becomes something a little nicer.
This top is McCalls 6794, which is sadly now OOP. When I bought the pattern, I was so excited about it, but something kept getting in the way of sewing it. I'm glad I finally did. It's darn cute and comfortable!
I made view C, which the model on the envelope is wearing. It features a high-low hemline, cut on, dropped sleeves and a bias faced neckline. The pattern utilizes a contrast fabric for the midriff panel and ties, but I thought there was enough going on with my print and used self fabric.
From the back, you can see the hemline a little better. The fitting in this top is all achieved by the waist tie and the front gathering. It's got a LOT of ease - I sewed 2 sizes smaller than called for by my measurements and made no alterations for my full bust. There's plenty of room for the girls in all that gathering.
My fabric is a polyester charmeuse that has been in my stash long enough that I've forgotten its origins. I likely bought it intending to use it for lining, as I rarely use poly charmeuse for garments, but it does have an excellent drape for this top, and gathers well without adding bulk. For this top, you definitely need a lightweight fabric with plenty of drape! Rayon challis, silk charmeuse or chiffon, or even a lightweight voile would work well.
So, I finished my top, so proud of myself for having used both stash fabric and pattern, and realized that I didn't have anything to wear it with. This shape doesn't really work with my flared jeans and all my skinny jeans were printed or bright colors.
So, I whipped out my trusty Jalie Eleonore pattern and some Ralph Lauren denim I got at Mood a couple of years ago and made some skinny jeans.
I won't talk more about the Eleonores - I love this pattern and I've made it several times - but I am glad this top pushed me to finally make a pair in regular denim. I mean, as regular as I ever get, you know. The denim is shot with gold threads... Because that's how I roll.

Monday, September 4, 2017

Ottobre 03/2014-16 sparkle tee!

My sassy girl recently outgrew her entire tee shirt drawer (conveniently timed for Top Month!), and there was much weeping and wailing as I "made" her get rid of many of her favorites. I told her to choose a few for me to recreate for her. One of those was a RTW Old Navy top that I had added HTV to. It was a beige shirt printed with gold stars all over it, and I really wasn't sure I would be able to recreate it. Where was I going to find the fabric?!
FabricMart came to my rescue with this grey/silver version that Myra just loves. Whew! I was afraid I was going to have to cut a zillion tiny foil stars. That would have been not so fun...
The original shirt had long sleeves and a gathered neckline. Myra requested short, puffed sleeves, since we live in the South and it's hot here. We found a perfect pattern in the 03/2014 issue of Ottobre. The original was designed for striped knits and to be cut on the bias for a diagonal stripe, but I didn't need that, so we cut it on the grain instead. Otherwise I didn't change the pattern at all. It's a really nice basic tee.
The neckline is a nice high scoop, gathered with clear elastic and bound with self fabric. Those stars gave my coverstitch binder a wee bit of trouble, but they sure look nice. The sleeves are puffed just at the cap and hemmed.
The top came in two lengths and I sewed the longer one, in the hopes that Myra will be able to wear it for more than 5 minutes. She's growing so fast these days!
At Myra's request, I replicated the decal on the original top, this time with silver glitter instead of gold. We do love to sparkle around here! I was so happy I was able to replicate a favorite top, and even to improve on it!

*************Tip for tops********************
Since it is Top Month for the stashbusters, I though I'd share a little tip for hemming in a tight spot, such as sleeves on a child's top like this one.
When I know I'm going to have limited space for pressing my hem (or and binding/bands - pretty much anything that is getting sewn in the round), I press the allowance up before sewing the piece into the garment. If it is a particularly small piece, like doll clothing, you can stitch the hem at this point as well, but I don't do that for human clothing, since it leaves a bump under the arm. Pressing the hem is at least 4000X easier on a flat piece than it is once the sleeve seam is sewn and you have a tube to deal with. Once the hem is pressed, it is much easier to fold up and stitch. As I mentioned, this also applies to binding and bands - press them in half before you sew them into a loop. It will be much quicker and easier! I hope that helps with your knit top sewing!

Friday, September 1, 2017

Stashbusting Sewalong 2017 : September is TOP MONTH!

Burda 10/05-115 knit top
If you've been following my blog for more than a minute or two, you know how much I LOVE sewing tops, so when Heather mentioned that she needed someone to head up Top Month on our Stashbusting Sewalong Facebook group, I jumped at the chance.
Vogue 8759 men's shirt
One of the things I love about this theme is that it is so flexible! Practically any style, level of complexity and fabric choice will work here. Want to make an easy tee shirt? No problem? Craving something complex? We can do that! Tops can be anything you can imagine!
Ottobre 04/2013-12 refashioned tee
You don't even have to limit yourself to people! Barbie need a tee to match? Go for it! Want to make your favorite pooch a cuddly top for winter walks? Let's make it happen!
A pair of Ottobre tees
Tops are super fun! I hope everyone in the group enjoys this month. I'll be posting a few more tops I'm working on as the month progresses, as well as some top-sewing tips that I have picked up along the way. I've also put together a Pinboard dedicated to sewing tops. It's a mix of patterns (some free!) and inspiration that I hope you will find useful. You can find the board here. Let's sew some tops!

Monday, July 24, 2017

Simplicity 1595 emergency recital dress

She looks carefree here, but a week ago, all was not calm as she realized that her piano recital was in a week and SHE DIDN'T HAVE A WHITE DRESS! It was urgent, especially as we spent the three days prior to her recital out of town, which gave me 2 days to sew it. That child...
Being a mom of small kids, I don't actually have a lot of white in my stash, but I had this bit of white seersucker shot with metallic silver that is quite suitable for angel wear. It also fit into my Stashbusting theme of deep stash, as it's at least 6 years old. Win-win.
Since I was quite short on time, I chose Simplicity 1595, as it is a pullover style with no zippers or lining or anything complex. The neckline and sleeves are gathered with elastic and the skirt and bodice are gathered into the waistband.
In back, there is a waist tie for shaping that is sewn into the waistband at the side seams. The skirt is nice and full and has a sweet little ruffle at the hem.
At the recital, she added a halo and wings to complete her angel look. If you'd like to see her piece, there's a video here.
Unfortunately, since I was a bit rushed, the fit isn't as perfect as I might have liked. The neckline is far too wide, and Myra reports that the waistband is itchy, so we had to add a tank top underneath. You can see the tank peeking out on her shoulder. It actually gives the impression of a square neckline, so I kind of like it.
At first, Myra wasn't thrilled with it, but in the end, it was just right for her recital. Yay for a last minute sewing win!

Thursday, July 13, 2017

Ottobre 03/2014-35 dress

After I finished cutting out my last dress, I had about a yard of fabric left over. I don't really use ITY much in small pieces, but I thought Myra might like a dress to match mine, so I went hunting for a pattern with similar features, particularly the gathering in the bodice and skirt.
After a perusal of my Ottobre collection, I found this dress from the 03/2014 issue. I love the style lines. It's a really nice echo of my dress, with the bodice gathers and waistband, but with a more youthful feel.
Ottobre suggested woven fabrics for it, but it works well in this lightweight knit with very few changes. I omitted the zipper, and rather than gathering the neckline with traditional gathering stitches, I used clear elastic so that the neckline would have sufficient stretch and recovery for the dress to go over Myra's head.
And of course, I added pockets. Dresses need pockets.
The design of the dress is fairly straightforward. The bodice gathers into the neckline binding and into the waistband at center front and center back.The skirt is full and gathered evenly around the waistband. Since the design is intended for wovens, the waistband has some ease in a knit.
I used my coverstitch binder to do the neckline and armholes. The pattern includes a pattern piece for bias binding, which I used to measure the elastic for the neckline. Myra loves her new dress and says she understands now why I like to wear dresses every day. They're so comfortable! Now to go hide my ITY stash before she claims it all...

Thursday, June 8, 2017

Simplicity 3678 maxi

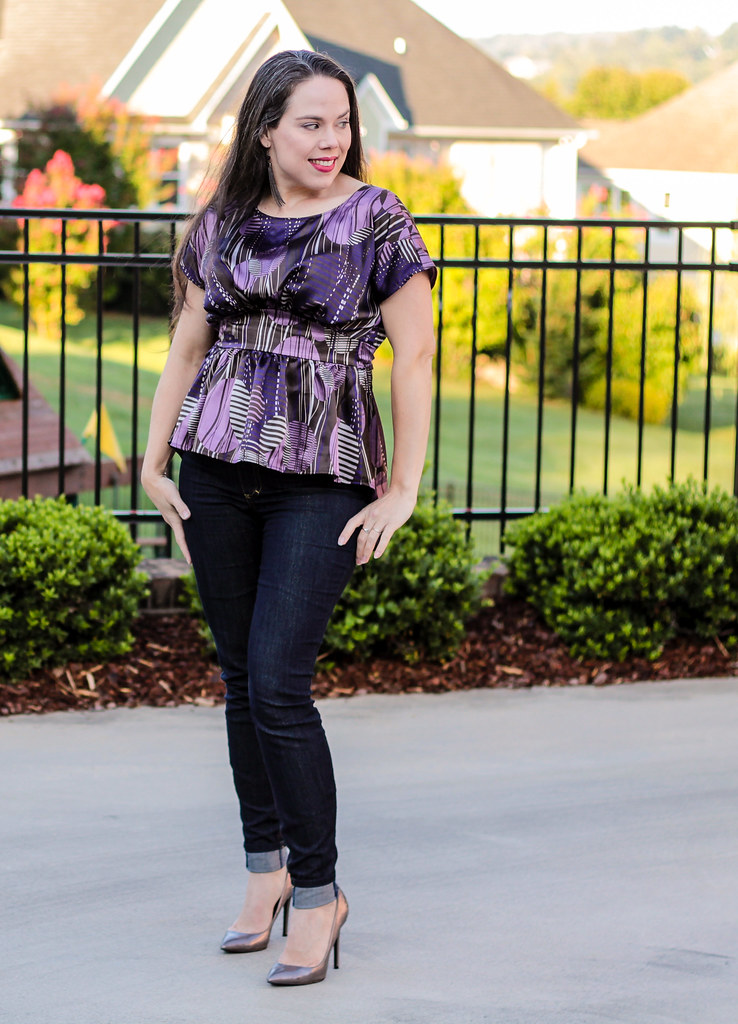
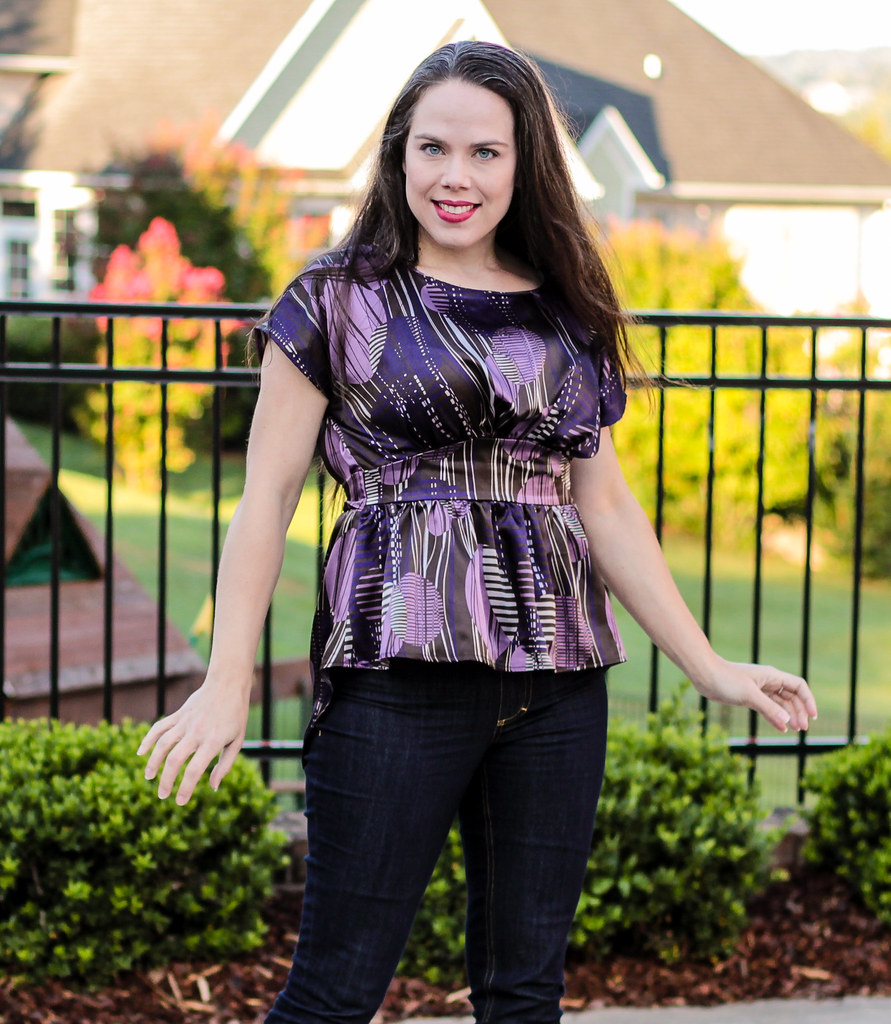
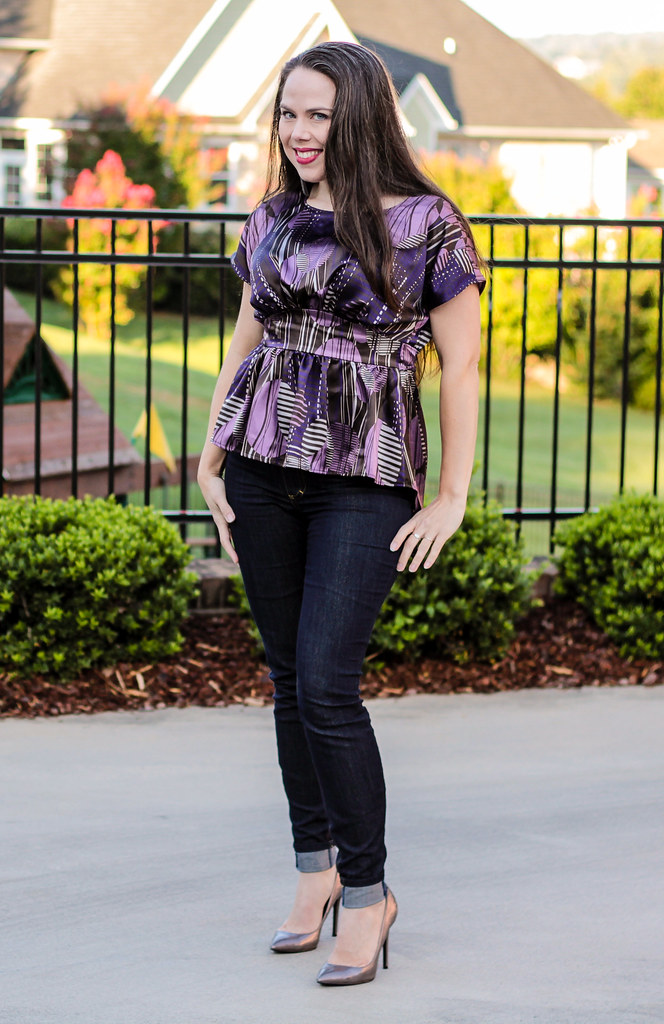
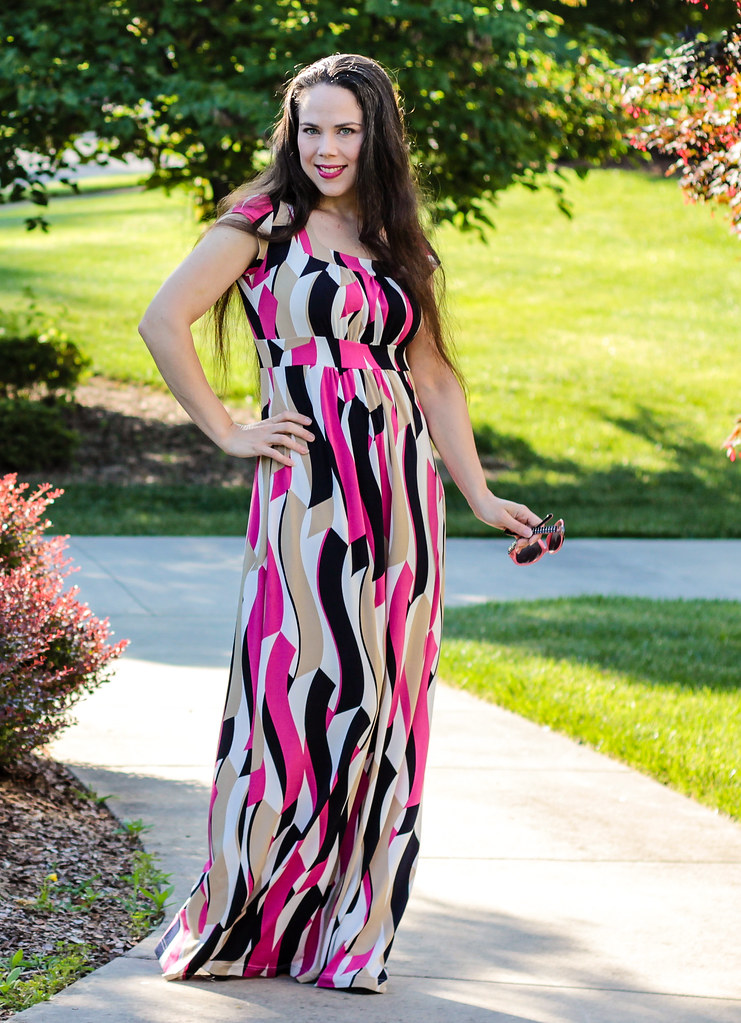
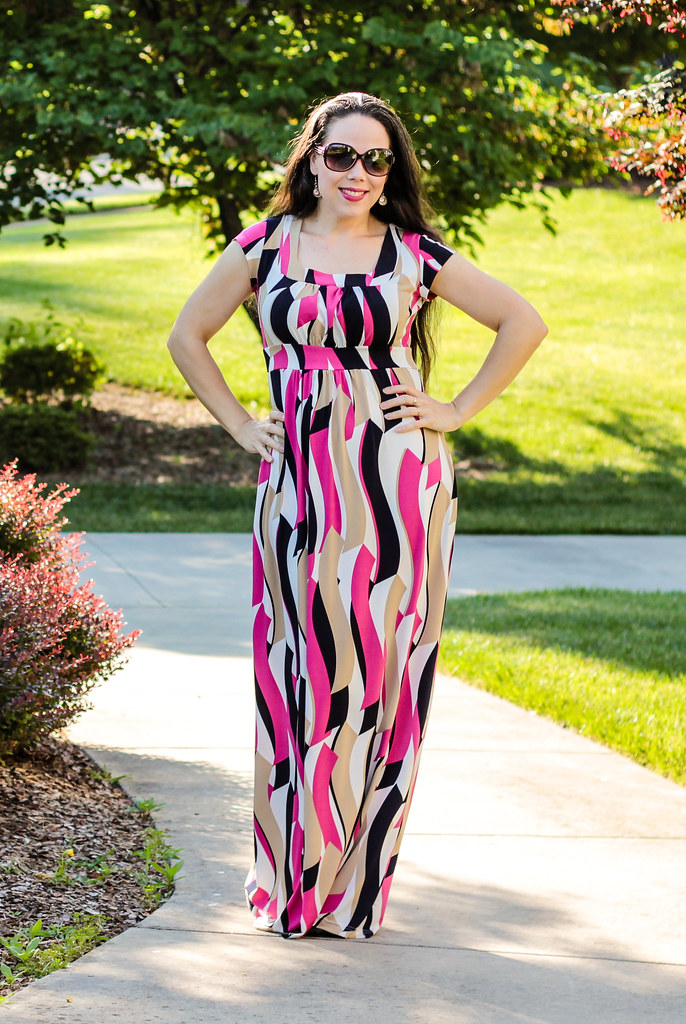
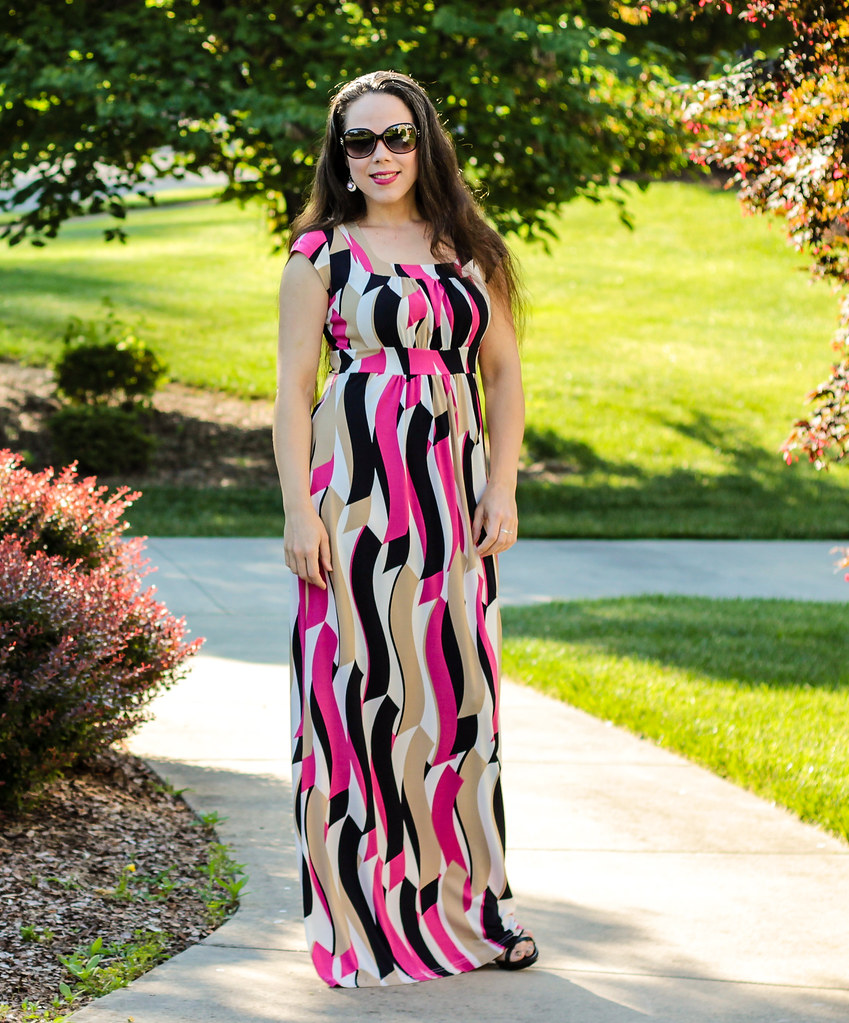
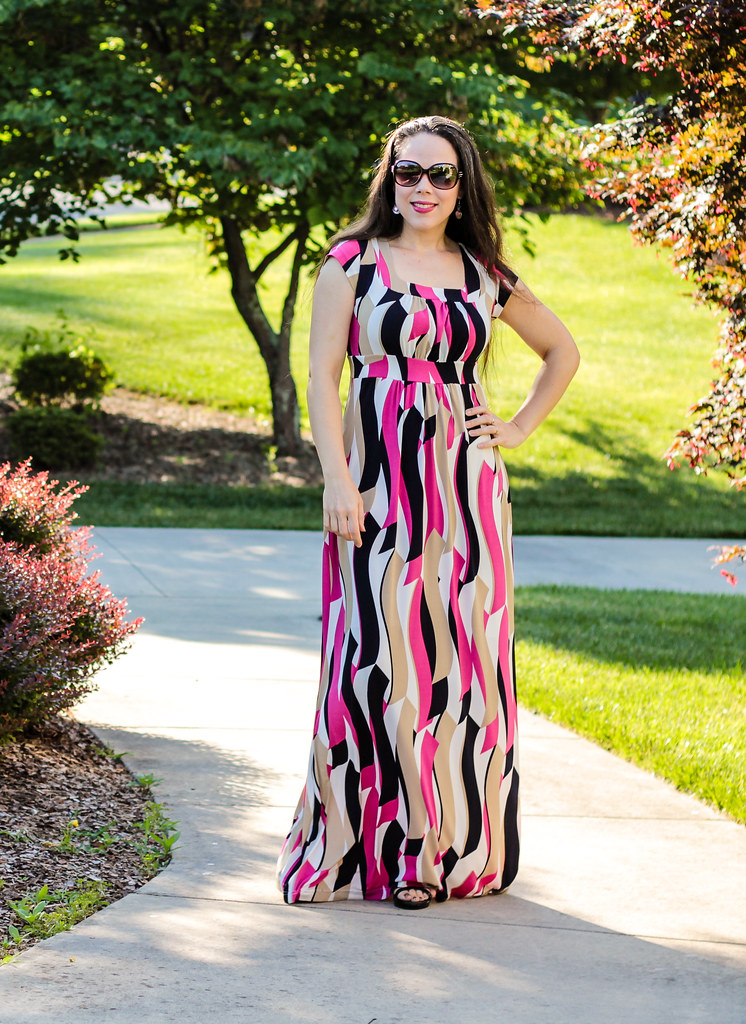
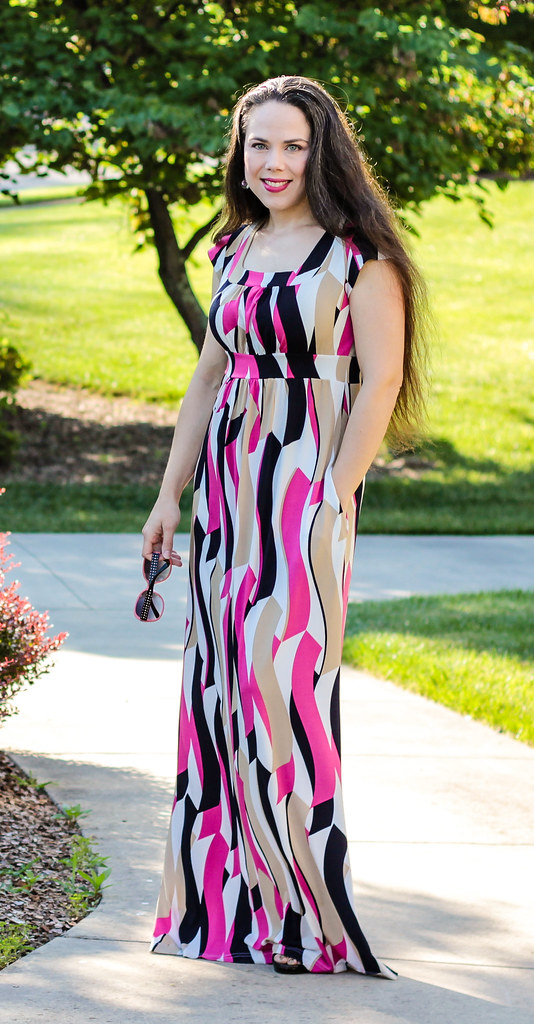
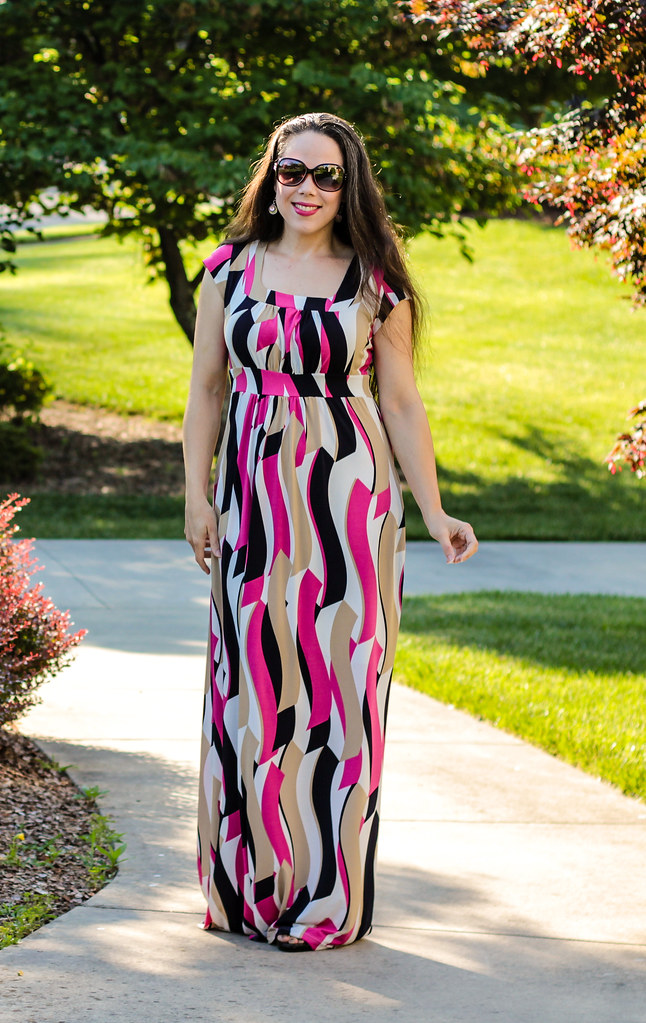
Hey look! It's me! I know y'all, I haven't been around much, and the few things I've sewn for me have been boring necessities. But I finally made myself something new and somewhat frivolous! Actually not at all because ITY maxi dresses are my summer uniform, so this will get worn all the time. But I digress - the dress!
This is Simplicity 3678, which I've made before (here). This is the first time I've tried this style bodice though, and I have to say, I'm pretty thrilled with it. During the maaaaannnnnyyyy years I was nursing my babies, I wore only wrap/surplice bodice dresses for easy nursing access, and I sort of got into a rut. But my last baby weaned 4 years ago, so it's well past time for some variety!
So, let's chat about this bodice. The neckband is shaped and faced. The pattern called for a self-fabric facing with fusible interfacing. Y'all know I'm incapable or following a pattern... I decided to try something out and instead used powernet for my facing pieces. I love how it turned out! The facing is nice and stable, but still stretchy and comfortable. Not to mention lightweight! Definitely going to do this in the future for knit facings.
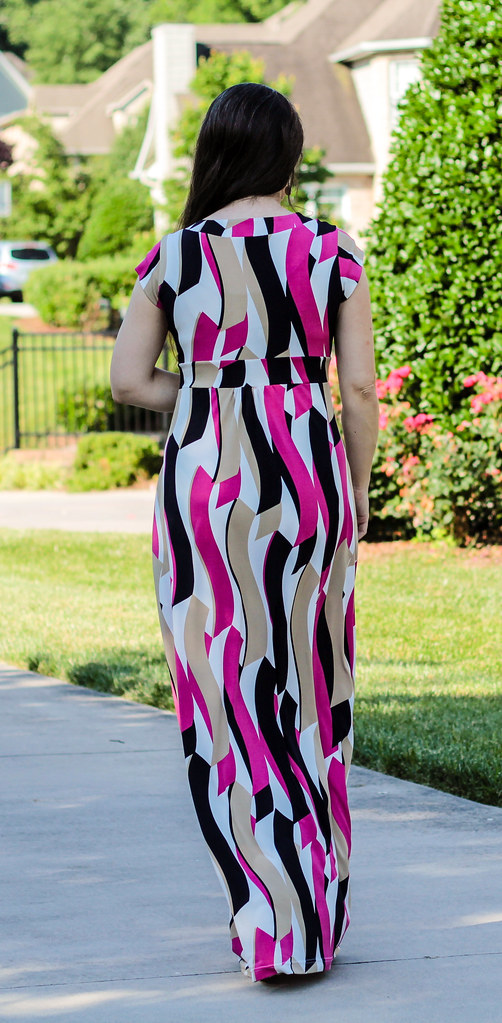
The back bodice is straighforward, but the pattern uses this back for both bodices, so it was drafted without the neckband. Annoying but minor. I drafted one for it. The skirt back has a bit of gathering, if you've some fluff you'd like to minimize, but not enough to look juvenile or emphasize anything you'd rather not.
For the sleeve, I used the cap sleeve from another view. I like this sleeve a lot. It's double layered, so no hemming. It did require a tiny bit of altering to fit into this armscye, so if you're sleeve swapping with this pattern, be sure to check.
For fit, I added some length to the bodice in order to fake an FBA. Since the bodice is ruched, there is plenty of space horizontally, but I did need a couple of inches of length to cover the girls. I added length throughout the area of gathering and then tapered off around to the back, which didn't require any alterations for me. Obviously I also added significant length to the skirt to make it a maxi. After it was done, I actually went back and forth about the length, even polling the interwebs for length opinions. It was hotly contested! In the end, y'all liked the maxi just a little bit better, and given my maxi bias, that's what I went with. After all, I can always cut it shorter if it makes me crazy!
The final, critical alteration - pockets! Seriously, why else do we sew but to have well fitting clothes with POCKETS! Get with the program, Simplicity and put pocket pieces in your patterns. Seriously though, how hard is that?!
Final verdict? I love it! Maxi dresses are my favorite. I don't know why I questioned it. But maybe I should make another one in a knee length...

Saturday, April 8, 2017

Jalie 3674 Isabelle running pant

Myra recently discovered a love for lycra running pants, so when Jalie unveiled the Isabelle running pants pattern, I knew I needed to get it for her.
She's also decided that Emojis are the coolest thing ever. (They're totally sick, mom.) So, when my friend Elizabeth sent me the link to this awesome emoji printed spandex, well. Must buy.
The Isabelle pattern is exactly the style Myra loves, and the pattern offers some super fun details. Myra chose the slim fit capri pant, but there is also a flare leg, as well as a style with leg bands to fit over ice skates.
I love the way the back legs wrap to the front, giving an interesting line when color blocked. The inset piece that wraps around the body just below the waistband is fun, and also where I did all my fit alterations, so those seams are super useful!
To fit Myra, I added some length at center back to cover her backside, which I tapered down around the contrast band. She wears her pants low in front, so I also lowered the center front to accommodate that, also using the contrast band piece as well as the center front leg. The waistband includes a hidden pocket at center front, so I didn't alter the waistband itself.
Myra is so happy with these that she's already asked me for another pair. They were surprisingly quick to sew, and I'm very pleased with how well they work out for her.